Manual for Windguru Station 2
(manual for Station 1 available here)Your windguru station consists of following main parts:
- White outside unit (transmitter)
- Black indoor unit (receiver)
- Davis anemometer
- Temperature sensor
Both anemometer and temperature sensor are already connected to the outdoor unit. The outdoor unit is battery powered and sends data to indoor unit every minute. The indoor unit is connected to internet and sends all data received to windguru.cz server.
Initial test and registration
- Unpack the package. At this moment it's not yet necessary to assemble the whole Davis anemometer, we are just testing now.
- Rotate the pin of the anemometer at least 20 times (the bottom pin where the wind cups will be attached), this will start the radio transmission, untill you do this the transmitter unit is in sleep mode and does not send any data to receiver (good for transport).
- Connect the indoor (black) unit to internet using the included ethernet cable.
- Power up the indoor unit by connecting the included power adapter, LEDs on the unit start blinking. By default the station reads network configuration from your network automatically using DHCP protocol, so in most cases you don't need to do anything special, just connect. If DHCP is not available on your network you will have to setup network manually (see below).
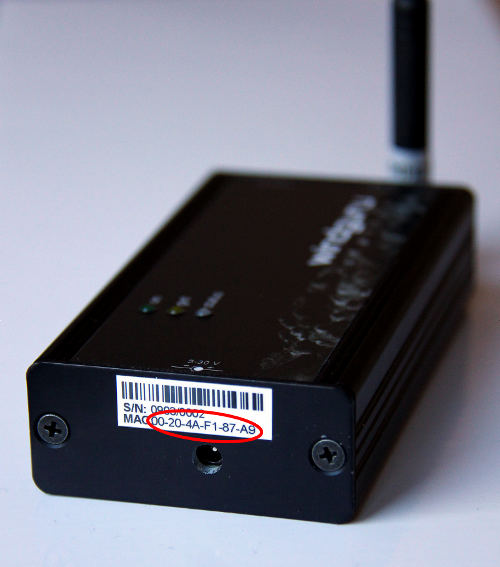
- Register your station at stations.windguru.cz. You will need to know the MAC address of your station for this (it is written on the black receiver unit) and watch the status graph available at stations.windguru.cz, after few minutes you should see that the station started to send first data.
Now you know that it works and you are ready for final installation. If it did not work try to troubleshoot, contact us if necessary.
Choose the right place
In order to choose the right place for installing your station please consider following facts:
- Anemometer should be installed in an open area without obstacles where wind can blow smoothly. Ideal height for measuring wind speed is about 10 meters above ground. The cable that connects the anemometer to the outdoor unit is about 12 meters long.
- The temperature sensor should be installed in a shady area. Ideal height for measuring temperature is about 2 meters above ground. The cable that connects the temperature sensor is about 1 meter long.
- The bottom of the transmitter unit with cables must point down to the ground! If possible it's preferred to mount the outdoor unit to a place without direct sunlight.
- Data between the outdoor and indoor unit are transfered wirelessly, maximum distance between the units is about 400 meters (in ideal conditions = in case of direct visibility), any walls or other obstacles between transmitter and receiver will shorten the working distance significantly!
As the main function of windguru station is to measure wind, in case you need to make a compromise, points 1. and 4. are the most important.
Final installation
- If not yet, connect and power up the indoor unit at it's final position.
- Position the outdoor unit on the place where you choosed to install it. Do this before final mounting of the anemometer. Now we need to check that the radio connection between transmitter and receiver is stable and everything will work fine.
-
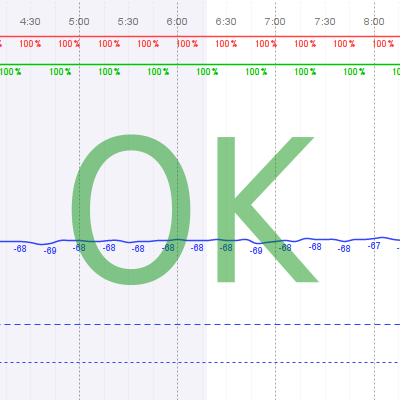
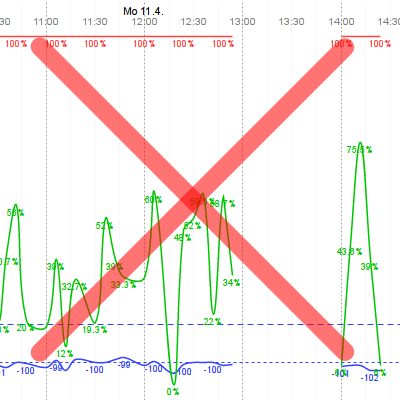
Watch the status graph at stations.windguru.cz it will provide useful info about signal strength and quality, if the values are below minimum recommended levels then try to reposition the units for better reception.
- Finally, install the anemometer. For details use the included instruction manual from Davis. Point the anemometer arm to north direction. In case you can't install it this way, it's no big problem, you can calibrate the direction later (see below)
- Secure the outdoor (white) unit. Use cable ties included or your imagination. The bottom of the transmitter unit with cables must point down to the ground!
- Done!
Station administration on windguru server
The station admin on our server is always available at stations.windguru.cz it allows you to manage your station, edit it's registration, view status (like battery, local IP, transmission status, signal power and quality), you can download measured data to your computer for further processing, configure widgets for your website.
Manual network configuration
By default the indoor unit reads network configuration from your network automatically using DHCP protocol, so in most cases you don't need to do anything special, just connect. If DHCP is not available on your network you will have to setup network manually:
- If you don't know what IP address you should assign to your station, ask your network administrator.
- Make sure the indoor unit is connected to the same network as your computer and powered up.
- Download Ethernet Configurator: zip file 533 kB (MS Windows only). Unzip and run the .exe file inside the EthernetConfigurator directory.
In the Ethernet Configurator window (see picture, click to enlarge):
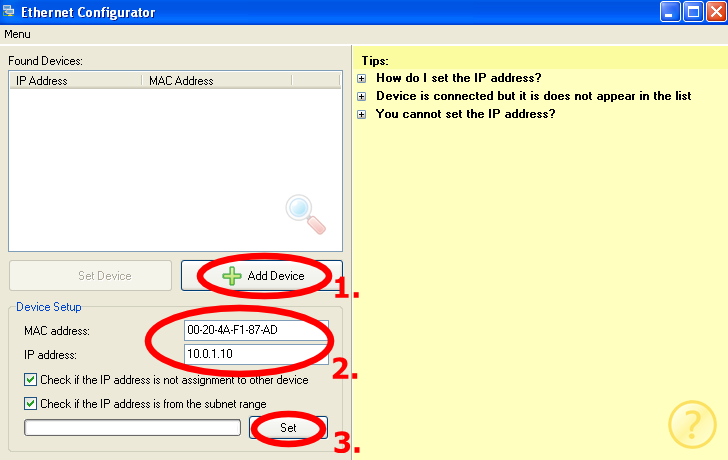

- Click the [Add Device] button
- Enter your station MAC address into the MAC address field, exactly as written on the side of the indoor unit
- Enter the desired IP to the IP address field
- Click the [Set] button
If succesful, the station IP / MAC should appear in the "Found devices" field. Now you can connect to your station by opening it's new IP address in your browser, station internal website will appear.
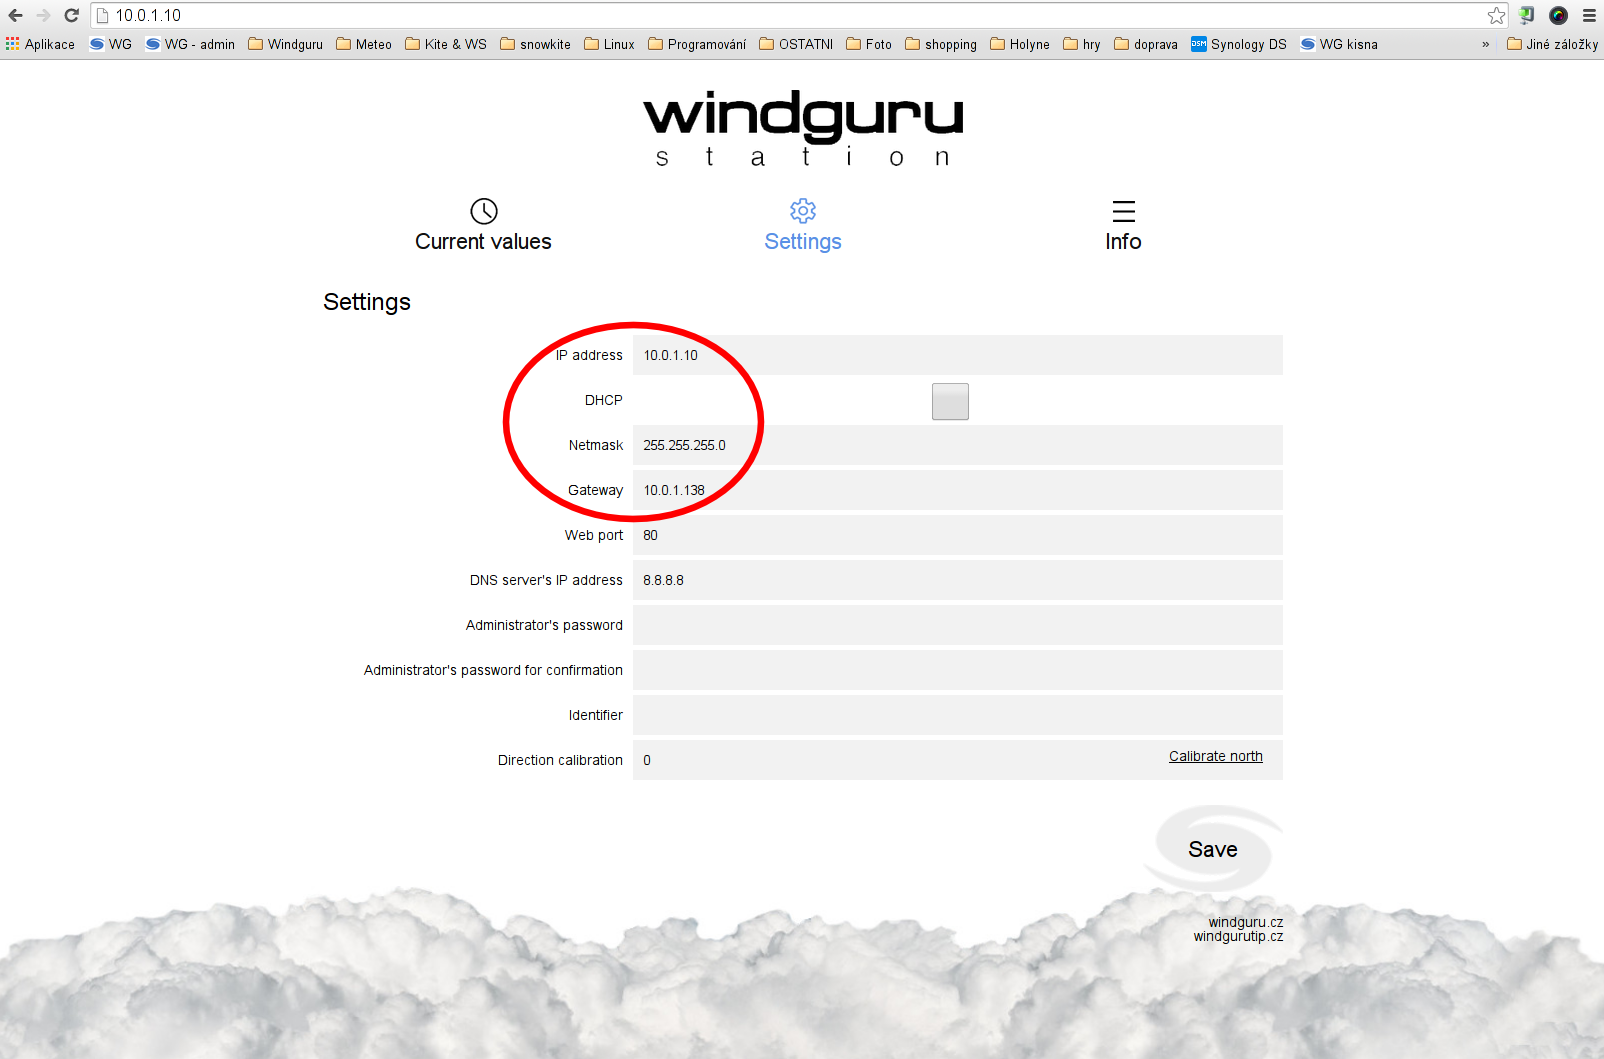
 In the internal site click "Settings" to open the configuration page where we will finish the station network configuration.
Now you only need to update "Netmask" and "Gateway", if unsure ask your network administrator. Windguru station use google DNS server by default (8.8.8.8), works fine in most cases. If you need you can change DNS to your preference.Finally click [Save] to store the new configuration.
(see picture)
Station internal website
Your station also features a simple internal website. There are three sections: Current values, Settings and Info. The settings page has folowing options:
IP address - do not change this if DHCP is enabled
DHCP - check this checkbox if you want to read network settings automatically (default)
Netmask - do not change this if DHCP is enabled
Gateway - do not change this if DHCP is enabled
Web port - this is the port that is used for the internal site, default is standard web port = 80
DNS server's IP address - default is 8.8.8.8 (google DNS server), if you want other feel free to change it but make sure it works otherwise station will not be able to connect to windguru server and upload data
Administrator's password - password to access the internal website, default is empty (no password required)
Administrator's password confirmation - if you are entering password, re-type it here
Identifier - if you really want to know what is this contact us at , leave this empty unless you know what are you doing ;-)
Anemometer direction - default is 0 (north), in case you did not mount the anemometer in north direction enter the real direction as degrees. For more info see Direction calibration of this maual. Warning! If you did direction calibration server side the value entered here must be 0.
Direction calibration
In case you can't mount the anemometer arm so that it points north, you will have to calibrate the direction in order to report wind directions correctly. You have two different options to do this:
- Calibrate direction in the internal website of the station
- Or calibrate direction in station admin on windguru server
Either will work, but do not use both methods together, otherwise the wind direction will be recorded wrong. Calibrate using the internal site if you plan to watch the measurements also on the local internal website of the station. If you are not planning to use the internal site to see current measurements (most cases), it's safe to calibrate server side.
- Measure the direction where the anemometer arm points to. Example: If it points east it is 90, north-east = 45, south = 180 etc.
-
- If you choose to calibrate in internal site, login to your station by opening it's local IP address in your browser, then switch to settings tab, enter the measured number into the "Anemometer direction" field and save.
- Or, login to the station admin on windguru server, then click the edit button and enter the mesured directions to "Anemometer direction calibration" field and save.


Reset to factory defaults
In order to reset the indoor unit to factory defaults, do this:
- Disconnect the power adapter
- Press the tiny reset button which you can find in the little hole above the ethernet connector (use a pin or something that fits, press gently!)
- Hold the reset button, connect the power and wait for about 10 seconds
- Release the reset button
Default configuration is: read network settings using DHCP, no password for internal site, DNS server 8.8.8.8, no direction calibration.
Changing battery in outdoor unit (Windguru Station 2)
The battery (CR123A - lithium 3V) should keep the outdoor unit alive for about 3 years. The station reports current battery status in the internal website and sends the status to our server so you can see it in the station admin too. We will also notify you about low battery by mail.
- Remove the cover
- Replace the battery, the red LED on the RF module should blink several times, then the green LED will blink for about 1 minute, then both LEDs blink several times and turn off
- Attach the cover back, make sure it's angled right so that the seal fits! Fasten the screws firmly.
- Remember that after restart, until the anemometer rotates at least 20 times the station sleeps and does not send any data...
